As the mom of two girls, I’ve often experienced craft envy. You know those fellow parents. The ones who churn out teacher gifts like cute personalized coffee mugs while you deliver yet another lame Starbucks gift card. Or the ones who volunteer to tie-dye T-shirts for the entire soccer team, complete with each child’s nickname neatly ironed on back. Or the ones who not only host girls’ night out, but also gift attendees with wine glasses adorned with sassy sayings that look like they were purchased from the cutest Etsy shop.
It turns out those Martha Stewart wannabes actually have a serious cheat tool in their crafting arsenals: A Cricut smart cutting machine, which is actually on sale right now.
What is the Cricut Explore 3?
If the well-stocked Cricut aisle at your local Michael’s or other craft supply store is any indication, the machines have become extremely popular. With three current models (the petite Cricut Joy, the popular Explore series and the pricier, made-for-serious-crafters Maker series), Cricuts look a lot like printers but are really smart die-cutters that can make precision cuts on more than 100 materials — delicate foils, vinyl, cardstock, cork, fabric, glitter paper or even balsa wood — all at lightning speed. These cuts can then be used to create stickers, greeting cards, iron-ons, signs and so much more right from the comfort of home.
If you’ve been using an earlier model, you will need to invest in new “smart materials” for the Explore 3. They generally cost a couple of bucks more than “everyday” materials, but — here’s the good news — they feed directly into the machine without the need for a mat. The Explore 3 also works twice as fast as its predecessor, the Explore Air 2, and can make projects 12-inches wide by a whopping 12 feet long — great for porch signs, banners or to cut several logos at once to make multiple iron-on T-shirts for, say, a family reunion. The machine also features a pen feature to draw fonts, designs and patterns on your materials.
To see if we could use the product to up (or even, honestly, start) our crafting game, we put the Cricut Explore 3 to the test.
First impressions
It seems a bit silly to call a cutting machine pretty, but the Explore 3 comes in the loveliest shade of soft mint green and, right out of the box, just made us smile. At 22.2-inches wide by 7-inches deep by 5.9-inches high (and weighing 11 pounds) it requires a relatively small space and is light enough to easily move around if you don’t have a designated crafting area. It also features a handy little docking stand to hold your phone or tablet and a built-in cubby to store some of the tools you’ll need to buy separately (more on that later).
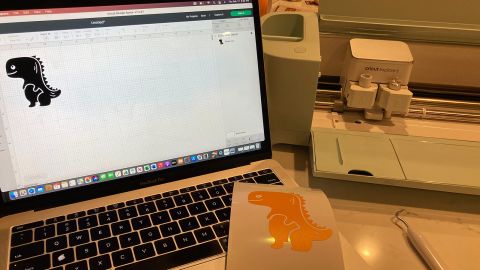
Hooking up the machine takes no time at all: Just plug it in and connect it wirelessly via Bluetooth or use the USB cord to plug it into your computer. A fine-point blade and a few sheets of practice material are included in the box, but you will need to download Design Space, the company’s free app for Windows and Mac (and iOS and Android). It includes a large selection of images, fonts and ready-to-make projects — and also allows you to upload your own images and fonts. If you plan to use your Cricut a lot, you’ll likely want to subscribe to Cricut Access for $9.99 a month. It gives you unlimited access to 200,000-plus images, 700-plus fonts and more, plus 10% off cricut.com purchases and exclusive deals. (Definitely take advantage of the free 30-day trial first.)
As mentioned, the Explore 3 also requires “smart materials.” These are specially designed rolls and sheets of vinyl, cardstock, iron-on paper and more that are made to be fed directly into the Explore 3 feeder, with no special mat needed, as other Cricut versions require. We found a 3-foot roll of Smart Iron-on on sale for $8.99, a 3-foot roll of permanent Smart Vinyl for $4.79 and a pack of Smart Paper Sticker Cardstock for $8.39.
If you’re sensing a theme of extra add-ons here you’re not wrong. Besides the smart materials, you’ll need a selection of tools to “weed” and “burnish” your projects (the Essential Tool Set is on sale for $29.99; more on those tools below). And there’s a slew of other blades, pens, markers, roll holders, heat presses and more available. Oh, and don’t forget Transfer Tape. You’ll definitely need that. Turns out crafting can be an expensive hobby.
But, armed with the essentials to get going, I was ready to find out if it was worth it.
Putting Cricut to the test
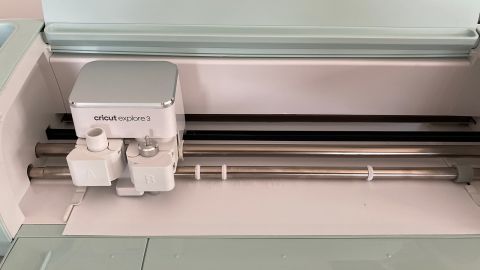
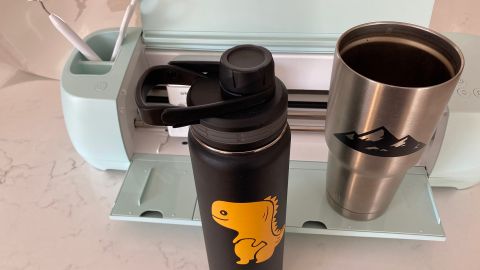
When you first set up the Explore 3, you are prompted to complete your first mini-project: Making a simple sticker. Eager to dive in, I followed the on-screen instructions and performed the practice cut with ease. After selecting a simple mountain image, I fed a sheet of vinyl into the machine and in maybe three seconds I had a cool new sticker for my Yeti tumbler. Dang. That was easy.
Feeling good, I used Design Space to search for another sticker image to use to customize one of my kid’s many water bottles. She picked a cute dinosaur labeled “easy” to make. And, yep! It was super easy. I sized the little guy down, clicked the “Make It” button and, again, followed the prompts. To remove the yellow vinyl sticker, I simply peeled the excess vinyl away, then used the “weeder” tool – it’s got a sharp metal hook and looks like something your dental hygienist uses to poke at your gums – to pull out any little pieces left behind. Next, I covered it with Transfer Tape that adheres to the vinyl and burnished it with a little tool that resembles a food scraper to make sure it would stick. Finally, I stuck the tape to the water bottle, burnishing it again, and peeled off the tape. And, the sticker stayed put — even after running it through the dishwasher.
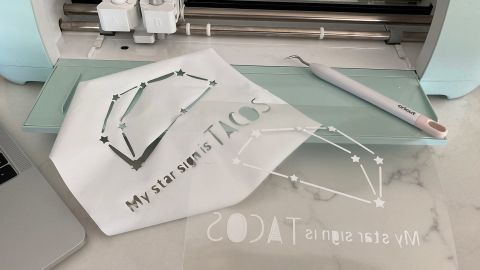
Now, it was time to do an iron-on transfer. Again, I started with an image marked “easy.” This one featured a pretty thin-shaped constellation in the shape of a taco with the words “My star sign is tacos.” (I thought my teen would think it was quirky/funny. She did not. Now it’s pajamas. Oh, well.) I followed the instructions to mirror the image (so it transfers correctly to your shirt), added my paper with the shiny side down and, voila!, iron-on cutout achieved. Once I peeled and weeded away the excess I simply ironed it on a pre-washed T-shirt for about 30 seconds. It worked perfectly.
Feeling cocky, I decided to make my own design for another iron-on shirt. And that’s where I fumbled. Pretty adept at PhotoShop, I figured this Design Space stuff would be a breeze. Almost two hours later I was about to throw in the towel, but, thankfully, I finally landed on a YouTube tutorial that saved the day. Once I got everything to play nice, the cut and iron-on part worked like a dream.
The moral of the story? If you plan to use the Cricut for its already existing Design Space projects, you can pretty much just follow the prompts and wing it. For anything more complicated, you’ll definitely want to watch tutorials and be ready for trial and error.
Bottom line
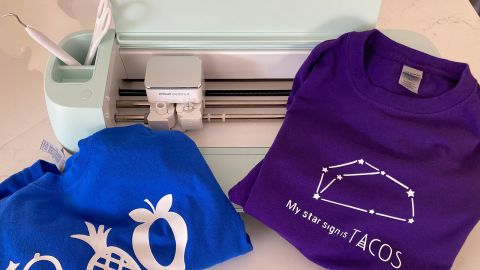
After the first couple of cuts and peels I quit wincing in fear of messing things up and now feel like an inner Martha I never even knew existed has taken over. I’m cutting stickers for the kids, taking iron-on requests with glee, making plans to label everything in my pantry and can’t wait to become my own one-woman greeting card designer. Seriously, who am I?
Yes, the Cricut Explore 3 takes some serious patience to get going on custom designs. And, no, at $300 for the machine, plus all the material, tools and subscription fees, it ain’t cheap. But once you get in the swing of it (and consider the cost of greeting cards, personalized T-shirt designs and more), anyone with a desire to be more crafty will quickly become obsessed. And the next girls’ night out? I’ll be the one bringing the sassy decal-embellished wine glasses.
Source: www.cnn.com

